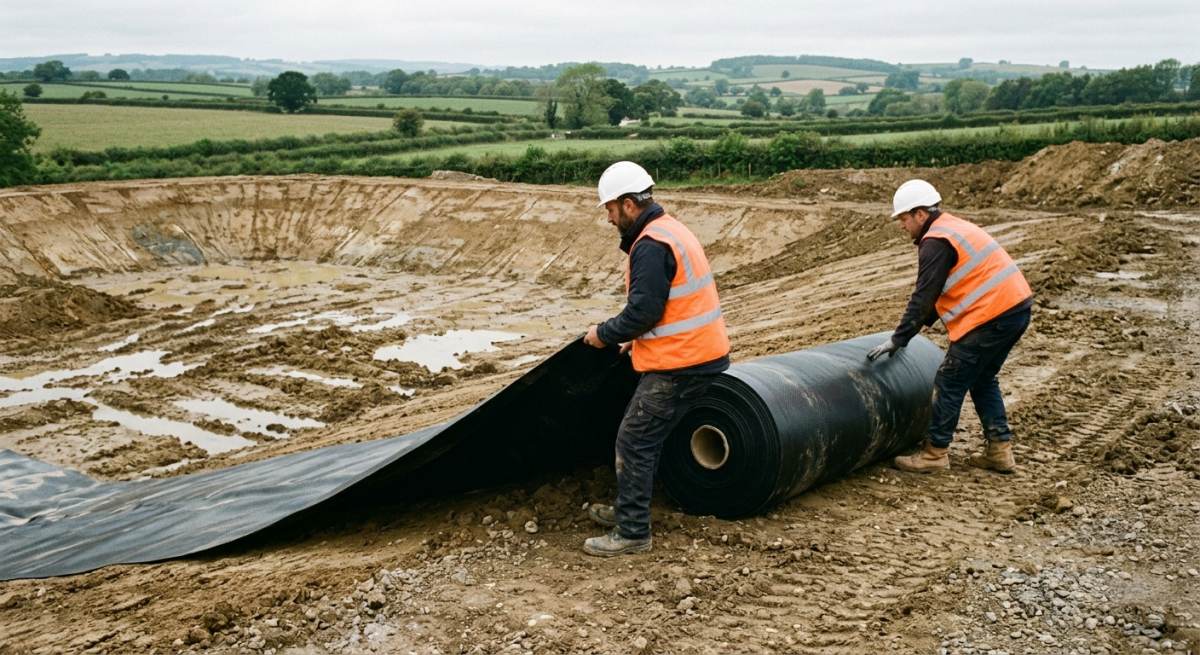
When preparing site foundations, skipping meticulous subgrade preparation before laying a ground gas membrane often leads to costly structural compromises down the line. Over 30 years of hands-on site experience shows that even top-spec gas barrier systems will fail if laid over poor, uneven ground. This article walks you through practical, time-tested methods for preparing subgrades correctly, ensuring your barrier remains intact and completely gas-tight. We cover everything from clearing sharp aggregate debris and managing moisture levels to selecting the right cushioning geotextiles for tough ground conditions. By taking a proactive approach to subgrade quality, site managers can avoid puncturing delicate membranes, ensure long-term structural integrity, and maintain compliance with stringent UK building regulations. Ultimately, spending a little extra time on correct site preparation saves thousands of pounds in remedial work while protecting future occupiers from dangerous subterranean gases like methane and radon.
Laying a heavy-duty ground gas membrane directly onto sharp, uncompacted subbase materials frequently leads to hidden punctures and tearing during installation. Site operatives walking across the site or placing reinforcement steel can easily force jagged stones straight through the membrane, completely compromising the protective seal before the concrete slab is even poured.
This damage creates unsealed pathways for harmful ground gases to seep into the finished property, leading to severe regulatory failures and hazardous indoor environments. Remedial repairs on a failed gas barrier systems setup after pouring concrete are exceptionally complex, resulting in astronomical bills and extensive project delays.
Adopting rigorous subgrade preparation protocols alongside robust blinding layers creates a smooth, stable foundation that protects your ground gas membrane from sharp underlying aggregate. Working with specialist installers ensures the subgrade is fully blinded, compacted, and inspected, safeguarding the long-term structural integrity of your gas protection system.
KEY TAKEAWAYS
- Proper subgrade preparation prevents sharp aggregate from puncturing the ground gas membrane during subsequent trades work.
- Blinding sharp subbase layers with sand or geotextiles protects gas barrier systems and guarantees complete gas-tight performance.
- Investing time in smooth, well-compacted subgrades safeguards long-term structural integrity and avoids costly remedial repairs after concrete placement.
Table of Contents
- Clearing the site and removing sharp debris from the working surface
- Achieving correct compaction and a stable formation level
- Selecting and applying the right blinding layer
- Managing surface water and moisture levels on the formation
- Final pre installation inspection checklist for ground gas barriers
- Frequently Asked Questions around Gas Membrane Installation
Need Specialist Advice on gas membrane installation?
Speak to our technical team today for tailored specifications, regulations compliance, and practical support.
Clearing the site and removing sharp debris from the working surface
Preparing a site for a ground gas barrier requires meticulous preparation long before any rolls of membrane are unfurled. Failing to properly clear the working surface poses an immediate threat to the structural integrity of the barrier system.
Ground clearance and initial debris removal
Site clearing must always be the first practical task on your preparation checklist to establish a clean base. Removing surface vegetation, loose rubble, and organic matter prevents long-term settlement issues and reveals hidden sharp objects underneath.
Vegetation and loose debris conceal hazards that easily puncture a gas membrane under heavy structural loads. Earth-moving machinery should scrape back the top layer until a firm, stable substrate is fully exposed across the entire footprint.
Follow this straightforward 3-step site clearance routine to ensure the surface is completely clear:
- Strip away all surface vegetation, topsoil, and organic roots across the full installation footprint.
- Remove large masonry fragments, redundant pipework, and stray construction waste from the main site area.
- Level out major humps and hollows to create an even, workable surface for the next phase.
Eliminating sharp aggregate and rogue fixings
Puncture prevention relies entirely on systematically removing sharp aggregate and stray metallic debris from the subgrade. Taking time to inspect the soil surface protects your investment and prevents dangerous gas leaks later on.
A single rogue nail, sharp piece of flint, or jagged concrete fragment can instantly compromise membrane protection under the weight of poured concrete. Site workers ought to perform a thorough manual sweep using hand tools and fine rakes to pick up rogue fixings, broken glass, and coarse stones.
For high-risk brownfield locations, running a heavy-duty magnetic sweep across the working area extracts hidden ferrous items efficiently. Passing fine sand blinding over exposed ground fills small voids and creates a cushioned buffer that protects the membrane from any remaining sub-surface grit.
Managing surface finish and final inspections
Final surface checks ensure the prepared earth meets strict site standards before laying any protective sheeting. Handing over a well-prepared subgrade saves valuable time and avoids costly remedial work during installation.
Site supervisors should walk the entire area to authorise the subgrade condition prior to unrolling gas barriers. If any exposed sections show sharp edges or loose stones, workers must re-rake and compact those specific spots immediately.
- Perform a thorough walking inspection to check the entire area for protruding hazards.
- Compact the cleared subgrade with a roller to bed down any loose particles into the soil.
- Apply a smooth sand blinding layer across any rough patches to guarantee maximum puncture prevention.
| Subgrade Preparation Method | Primary Cushioning Material | Puncture Protection Level | Key Site Consideration | Best Suited For |
|---|---|---|---|---|
| Sand Blinding Layer | 50 mm washed sharp sand | Moderate | Can wash away in heavy rain before membrane laying | Well compacted granular subbases and smooth blinding beds |
| Geotextile Fleece Underlayment | Non woven polypropylene fleece 300g per sq m | High | Requires 300 mm minimum overlaps at all fleece joints | Coarse aggregate bases and subgrades with angular stones |
| Blinded Dust Fill | Fine crushed limestone dust or blinding fines | Moderate to High | Needs thorough mechanical rolling to prevent rutting | Filling surface voids in coarse type 1 subbase formations |
| Smooth Structural Concrete Slab | Power floated or smooth wood tamped concrete | Very High | Surface must be swept clean of all loose debris and burrs removed | Suspended slabs or ground bearing concrete bases |
Achieving correct compaction and a stable formation level
Achieving proper subgrade compaction requires a systematic approach to ensure long-term site stability. You must prepare the base correctly to prevent future structural movement from damaging your protective gas barrier.
Why subgrade compaction matters for gas barriers
Ground settlement often causes flexible gas membranes to stretch, shear, or tear along uncompacted subgrade profiles. Proper subgrade compaction creates an even, robust foundation that supports heavy ground-bearing slabs without shifting over time.
When soft spots remain in the ground, differential settling creates void spaces beneath the liner. These hidden pockets allow harmful ground gases to collect and build up pressure. Over 30 years of site experience shows that a well-compacted base keeps the membrane flat, preserving the integrity of every welded joint.
Step-by-step formation level preparation
Setting a true formation level ensures your gas protection system lays perfectly flat across the entire plot. Follow this proven sequence to establish a smooth, level base before installing any underlying geotextile cushion.
- Excavate the area down to the specified formation level, removing all organic topsoil, loose roots, and sharp debris.
- Run a heavy plate compactor or twin-drum roller over the exposed soil, passing over each section at least 4 times to eliminate soft pockets.
- Blind the compacted surface with a 50mm layer of clean, well-graded sand or fine stone dust to seal open voids.
Choosing the right plate compactor for the job
Selecting appropriate compaction equipment depends entirely on your soil type and total site area. Matching the machine to your ground conditions guarantees uniform density across the entire formation level.
Granular soils like gravel and sand respond best to high-frequency vibratory equipment that shakes particles into a tight matrix. Cohesive clay soils require heavy rammer plates or padfoot rollers to knead the damp material together effectively. Using the wrong kit leaves sub-surface air gaps that compromise the entire gas protection system.
Identifying and fixing soft spots
Spotting weak areas early prevents localised ground settlement from pulling on sealed membrane laps. Experienced installers inspect the entire formation level thoroughly before approving the ground for membrane deployment.
- Proof-roll the entire formation level using a fully loaded site tipper to highlight any flexing soil.
- Dig out localised soft spots to a minimum depth of 300mm below the surrounding target profile.
- Backfill the excavation with suitable well-graded aggregate in 150mm layers, compacting each run fully before adding the next.
Once you achieve a firm, unyielding surface, blinding the aggregate creates a smooth base. This final layer protects your gas barrier against puncture risks from sharp, underlying stones.
Selecting and applying the right blinding layer
Selecting the appropriate blinding layer is about protecting your gas barrier from sharp, jagged edges in the underlying aggregate base. By creating a smooth, stable surface, you ensure the membrane lies flat without risking costly punctures during installation.
Choosing between sand blinding and geotextile fleece
Sand blinding offers a traditional, budget-friendly way to smooth over rough aggregates before membrane deployment. Alternatively, a heavy-duty geotextile fleece provides superior puncture protection on particularly aggressive or uneven sites.
When deciding on the right material for your site, consider the following options:
- Sand blinding uses fine, washed sand spread evenly over the subgrade to fill small gaps and cover minor sharp edges.
- Geotextile fleece acts as a durable cushion that absorbs heavy impact from sub-base materials and ongoing foot traffic.
- A combined layer uses both materials on rougher ground to deliver maximum protection for high-risk gas installations.
Applying the blinding layer effectively
Proper application requires uniform coverage across the entire footprint to eliminate any exposed sharp points. Taking time to prep the surface correctly saves hours of awkward repair work further down the line.
To achieve a reliable finish, follow this simple 3-step routine:
- Clear the aggregate base of large debris, loose rocks, and standing water.
- Lay your chosen sand blinding to a depth of at least 25 mm, or roll out the protection fleece with generous overlaps.
- Compact the surface lightly to ensure a firm, even bed that won’t shift when workers step onto it.
Verifying surface readiness before membrane placement
A thorough visual check guarantees that no hidden stones can pierce your newly installed barrier under load. Skipping this final review often leads to compromised gas resistance and expensive remediation work later.
Walk the site systematically to feel for sharp protrusions beneath your feet, paying extra attention to corners and service pipe penetrations. If you spot any rough patches poking through the sand blinding layer, add extra material or lay down additional protection fleece immediately. Once the surface feels soft, flat, and firm underfoot, your subgrade is fully prepared for the main gas membrane installation.
Managing surface water and moisture levels on the formation
Controlling water on site requires a proactive approach before any ground gas membrane is laid. Uncontrolled moisture compromises subgrade saturation levels, weakens the structural formation, and prevents successful installation.
Implementing effective site drainage solutions
Site drainage must be fully operational well before membrane installation begins to divert runoff away from the active work area. Establishing clear channels early on prevents standing water from pooling across the prepared subgrade.
To maintain a stable formation, follow this 3-step surface water management routine:
- Dig temporary perimeter ditches to intercept surface water before it reaches the core formation.
- Install submersible sump pumps at low points to remove excess rainfall quickly.
- Grade the subgrade with a gentle 1 in 50 fall toward collector drains to prevent localised ponding.
By managing runoff effectively, you protect the load-bearing capacity of the soil. Ground gas barriers require a firm foundation, and keeping the area dry ensures the subgrade does not turn into slurry under foot traffic.
Eliminating standing water before installation
Standing water must be cleared completely using mechanical pumps and wet vacuums prior to rolling out any materials. Leaving pockets of water underneath a barrier leads to long-term structural instability and severe installation delays.
Drying out saturated spots requires a methodical site routine:
- Pump out all visible surface pools into designated silt traps.
- Scrape away softened, top-tier mud to expose the firm subgrade beneath.
- Backfill shallow depressions with well-compacted, dry aggregate.
Excess moisture directly affects membrane adhesion, particularly when using self-adhesive gas tanking sheets or liquid-applied vapour barriers. Clean, dry substrates ensure tape primers and gas-proof seals bond securely without the risk of delamination.
Monitoring subgrade saturation levels
Checking soil moisture levels is an essential step that site managers must carry out daily during wet weather. Highly saturated soil loses its compaction strength, which can cause the gas barrier to stretch or tear once concrete is poured above it.
Simple hand-testing alongside electronic moisture meters will tell you if the formation is ready. If the soil leaves deep ruts under light machinery or feels spongy underfoot, it needs further drying time or aeration. Allowing the ground to dry thoroughly preserves the structural integrity of the subgrade and guarantees that your gas mitigation system performs reliably for decades to come.
Final pre installation inspection checklist for ground gas barriers
Before laying a single roll of material, carrying out a comprehensive pre installation check protects your project budget and long-term site safety. Taking the time to systematically evaluate the subgrade ensures that your gas membrane installer works on a flawless foundation.
Verifying surface smoothness and subgrade integrity
A thoroughly prepared subgrade must be entirely free from sharp detritus, standing water, and deep ruts. Inspecting the substrate closely prevents costly punctures and guarantees full BS 8485 compliance across the site.
To ensure your ground surface meets rigorous quality standards, run through this quick 3-step physical audit:
- Remove all loose aggregate, exposed rebar ends, and sharp stones larger than 5 millimetres.
- Blind the subgrade with a clean 50 millimetre layer of well-compacted sand or install a high-specification protective geotextile cushion.
- Confirm the substrate is firm enough to support foot traffic without leaving deep indentations or channel ruts.
Assessing environmental conditions and moisture levels
Excessive surface water or severe dampness drastically compromises the integrity of membrane jointing tapes and welds. Checking environmental conditions beforehand ensures your specialised sealing materials bond correctly and perform over decades.
You should never attempt membrane placement during active rain or inside waterlogged trenches. Ambient temperatures need to remain above 5 degrees Celsius to guarantee optimal joint adhesion, whilst high winds must be mitigated to prevent sheeting from lifting during placement. If you discover localised pooling water, pump the area clear and allow the subgrade surface to dry before allowing technicians onto the plot.
Checking service penetrations and structural edges
Pipe penetrations and perimeter edges represent the most common leakage points for ground gases if left unchecked. Validating these complex junctions ahead of time allows for smooth quality assurance sign-offs down the line.
Inspect every pipe collar, corner detail, and wall junction to confirm they are clean, dry, and fully accessible. All structural protrusions must be solidly fixed in place so they do not shift when the barrier is dressed around them. Taking extra care at these critical interface points guarantees robust protection against hazardous soil gases, keeping your entire development fully protected and fully compliant for years to come.
Frequently Asked Questions around Gas Membrane Installation
Why Is Subgrade Preparation So Important Before Installing A Gas Membrane?
Properly preparing the subgrade ensures your gas membrane remains completely intact and free from punctures after installation. If the ground underneath is uneven or full of sharp stones, the weight of the concrete poured on top can easily push those sharp objects through the barrier, causing hidden tears that compromise the entire system.
Taking the time to clear, level, and cushion the base gives the gas membrane a smooth surface to rest on. This simple step guarantees that dangerous ground gases like methane or radon cannot leak into the finished building later on.
What Is The Ideal Surface Condition For Laying A Ground Gas Membrane?
The ground surface should be smooth, well compacted, and completely free from sharp debris or standing water. You want a flat bed that can support the membrane without stretching or stressing the material when workers walk over it during construction.
In most cases, applying a clean layer of sand or a geotextile fleece over the compacted subgrade creates the perfect receiving surface. This protective blinding layer acts as a soft cushion, preventing any stray sharp stones from damaging the membrane above.
Can You Install A Gas Membrane On Wet Or Muddy Ground?
You should never install a gas membrane directly on top of slurry, deep mud, or standing water. Excessive water prevents adhesive tapes and top hat seals from sticking properly, which makes it nearly impossible to achieve airtight joints.
If your site is particularly wet, you will need to drain the standing water and allow the subgrade to dry out first. Adding a layer of dry aggregate or a heavy duty geotextile fleece can also help create a workable, stable surface for the installation team.
How Thick Should The Sand Blinding Be Over A Coarse Subgrade?
A sand blinding layer should typically be around 50 mm thick to cover any coarse stones or rough aggregates thoroughly. This depth provides a reliable barrier that smooths out bumps and buries potential puncture hazards deep beneath the surface.
Once spread, the sand needs to be lightly compacted so it forms a firm, even bed. Checking the depth across the site ensures there are no thin spots where sharp subgrade materials could poke through.
Do I Need To Use A Geotextile Underlay Under Every Gas Membrane?
You do not always need a geotextile underlay, but it is highly recommended whenever the subgrade contains sharp stones, crushed concrete, or rough gravel. If your ground is already blinded with a smooth, clean sand layer, you might not require the extra protection.
Using a fleece underlay offers brilliant peace of mind because it adds a continuous protective buffer between the membrane and the ground. It is a very cost effective way to safeguard your investment against unexpected tears during the build.
What Happens If A Sharp Stone Punctures The Gas Membrane During Laying?
A puncture creates a direct pathway for hazardous gases to pass through the membrane and collect inside the building. Even a tiny hole can significantly reduce the overall effectiveness of your gas protection system, potentially failing quality inspections.
If a puncture occurs, you must repair it immediately by patching the damaged area with a piece of matching gas membrane. The patch should overlap the hole by at least 150 mm on all sides and be fully sealed using approved gas resistant tape or thermal welding.
How Far Should Joints Overlap Between Gas Membrane Sheets?
Joints between individual membrane sheets should overlap by a minimum of 150 mm to ensure a completely gas tight seal. This generous overlap leaves plenty of room for applying double sided butyl tape and single sided lap tape without running off the edge.
If you are using heat welding techniques instead of tape systems, you still need to maintain an overlap of around 50 mm to 75 mm. Keeping overlaps neat and clean is essential for passing independent site validation checks.
Is A Site Integrity Test Required After Laying The Gas Membrane?
Yes, independent integrity testing is standard practice on most development sites to prove the installation is fully gas tight. Visual inspections alongside specialist methods like air lance testing, dielectric testing, or tracer gas testing help identify any leaks before the floor slab is poured.
Catching small installation faults during a test saves massive amounts of time and money compared to fixing gas leaks after the building is completed. Having a clear validation report is often a strict requirement for local council sign off.
How Should Pipe Penetrations Be Sealed Through The Membrane?
Pipe penetrations must be sealed using preformed top hat units secured with gas resistant double sided tape and jubilee clips. You should cut the membrane neatly around the pipe, slide the top hat down, and seal both the flat collar to the membrane and the vertical neck to the pipe.
Alternatively, you can use specialised gas resistant liquid membranes or bitumen compounds to seal complex pipe clusters where preformed boots will not fit. Every single service entry point needs to be completely airtight to keep ground gas out.
What Measures Prevent Damage To The Membrane Before The Concrete Pour?
You should restrict foot traffic over the laid membrane and instruct workers to wear soft soled footwear at all times. Placing temporary timber boards or rubber walkways over high traffic areas helps distribute weight and prevents sharp objects from being ground into the surface.
It is also wise to pour the concrete slab as soon as possible after the membrane passes its quality check. Leaving the bare membrane exposed for weeks increases the risk of damage from wind, weather, and other trades working on site.
Ready to Discuss Your gas membrane installation Project?
Get in touch with our specialists today for detailed site guidance, technical specifications, and a quotation tailored to your requirements.